Communicating your research with ArcGIS StoryMaps

Map of Devastating 2003 Heat Wave in the Netherlands Observed from MODIS Satellite. Mehdi Aminipouri (PhD Candidate in Geography at SFU)

What is StoryMaps?

ArcGIS StoryMaps is an online storytelling tool that enables you to integrate interactive/static maps with multimedia content (i.e. video, audio, images, etc) to create an immersive storytelling experience It can give your research a stronger sense of place, illustrate spatial relationships, and add visual appeal to your work. Transforming your research into a visual narrative can help communicate your research to the general public. 

Examples of StoryMaps by SFU Community

ArcGIS Story Maps can accommodate a lot of genres of stories.

Browse the ArcGIS StoryMaps Gallery to find hundreds more examples and get inspired! Click the filter symbol at the top right to filter the results by category or industry. 

How to sign in 

To use ArcGIS StoryMaps, you will need an ArcGIS Online (AGOL) account. If you don't already have one, read the instructions on how to create a SFU-linked AGOL account and follow the steps on that page to create an account.

After your logged into ArcGIS Online successfully with your SFU computing ID, your ArcGIS Online account is created. You can now access StoryMaps by clicking on the "App Launcher Icon" (shaped like a nine-dot icon from the right top corner of your homepage) and then choosing ArcGIS StoryMaps

storymaps login

Additional notes and tips: Accounts across platforms and logging in

ArcGIS Online and StoryMaps are linked tools—both from the company ESRI. An account for one works in the other as well.

A SFU-linked account provides access to a variety of useful capabilities that go far beyond what is offered by the free-tier "public" ArcGIS Online accounts. 

Next time when you need to log into StoryMaps, you don't need to go to ArcGIS Online site first. You can simply visit storymaps.arcgis.com, click on sign in, and enter information into the Your ArcGIS Organization's URL box: simonfraseru (see image), and when you are directed to another webpage, click on "Simon Fraser University" (the blue button) and sign in with your computing ID:

log into StoryMaps another way


Learning ArcGIS StoryMaps

 Canvas tutorial: Teach yourself StoryMaps or embed in your SFU course

ArcGIS StoryMaps Tutorial (via Canvas)
This Canvas tutorial is designed for self-learning of the tool. It can also be used by any SFU courses (available from the Canvas Commons). 

 Guides and tutorials from Esri's StoryMaps team

ArcGIS StoryMaps Tutorials
In this collection you will find all of the instructional content produced by Esri's StoryMaps team, including guides for new users, in-depth tutorials for specific features, and tips for effective storytelling.

Other support the Library offers

We are happy to offer in-class visits to introduce students to this tool, adapted to the course's context. Additionally, we can provide technical support for students and researchers. Contact Sarah (Tong) ZhangLibrarian for Geography, GIS, & Maps at tza68@sfu.ca

StoryMaps Q&A for coursework 

How to cite images on StoryMaps?

The example provided here uses the APA style. You need to adapt your citation depending on the citation style you use.  

According to this APA guide, copyright attribution is used for an image instead of an in-text citation. The copyright attribution consists of the same elements as the reference list entry, but in a different order. There are two ways to include copyright attribution for an image on StoryMaps:  

Option one: Create an image caption

You can include the attribution in the image caption (a written description underneath an image). 

Option two: Embed the attribution

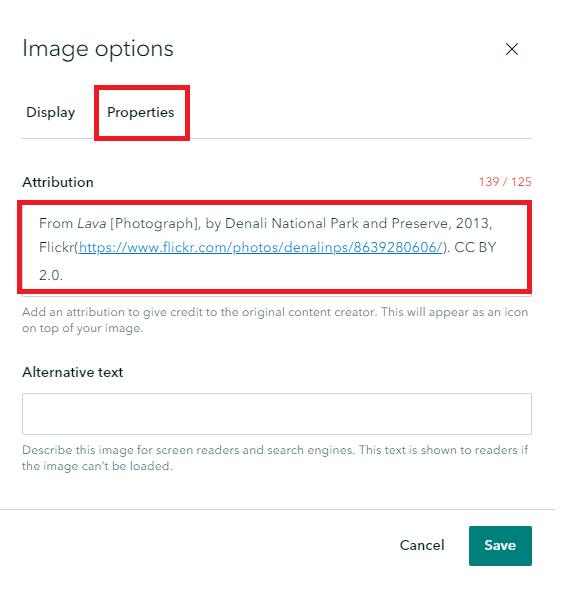
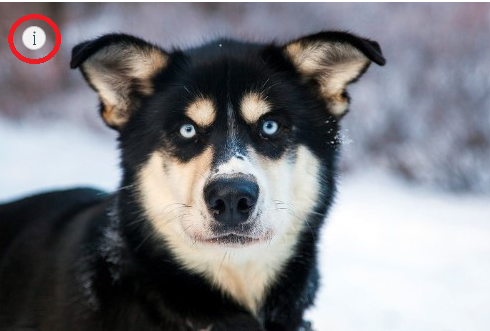
Embed the attribution in the Info icon that hovers on the top left corner of the image. This keeps the citation and photo coupled together in a non-intrusive way. 

Here are the steps to follow:

  • Upload an image to StoryMaps. 

  • Hover on the image, click the Options icon (the gear symbol). In the image options window, click Properties tab, and enter the attribution info to the box)

  • Now you will see an Info icon show up in the top left corner of the image. If you hover over it, you will see the attribution appear.  

 Remember, you will also need to provide a reference list entry for the image at the end of your story. 

How can our group members collaborate on a story?

An ArcGIS Online (AGOL) group will need to be set up. 

If your group members only need to be able to view a story map that is visible only to the group, you can create an AGOL group yourself. Please refer to this AGOL guide Create Groups


However, if the group members all need editing rights for a shared story, please email Sarah (Tong) ZhangLibrarian for Geography, GIS, & Maps at tza68@sfu.ca to request such a group. Once a group is created, you may follow these steps for sharing and collaborating on your story map: 

  • Publish your story to your group: on top of your story map, click the “publish” button:
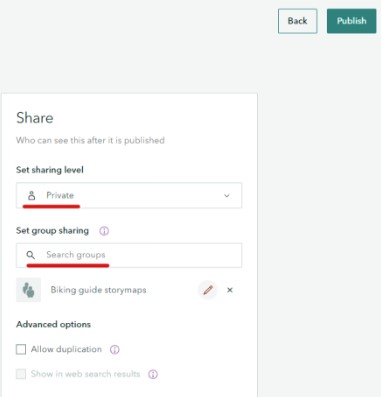
  • Keep the sharing level as “Private”, and search for your group’s name:
  • Now everyone in the group should be able to edit the story. 
  • Note: when anyone makes changes to the story map, they will need to publish the changes, otherwise the changes will be only visible to the person who made the edits.